Fast and Easy Extension Ideas for Dolphin Treasure
I have to admit, I’m pretty bad about completing projects and activities, especially if they are going to require a lot of prep, time, or supplies I don’t have on hand at home; especially if they cost a lot. As a part of my Sonlight Extension Activities for read-alouds series, I have tried to come up with activities that are fun and exciting, but use as little time and energy as possible, with one or two activities per book that might require actual effort on my part to gather a few things or take a trip. But, for the most part, they are fast, easy, inexpensive, and require a low level of parent involvement.
Chapter 1: Sunken Spanish Treasure
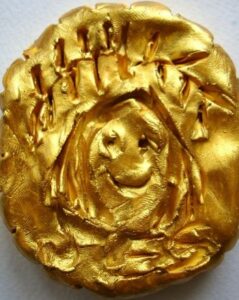
Supplies: small plastic lids such as from a milk gallon, air dry clay or other type of dough that will dry in place, gold colored paint, paintbrush, cardboard, scissors.
Create your own treasure to bury by making gold coins. Using small lids (milk gallon lids work well, but any small bottle lids will work. Fill the inside of the lid with clay. Using cardboard, cut out shapes to decorate your coins with. We used simple numbers 1, 2, 5, and 0, small enough so we could place one or two numerals in each coin. We pressed the numbers onto the coin to make different denominations.
Once the clay is dry, about 24 hours, paint the “coins” with the gold paint. When the paint is dry, they are ready to play with. You can have them hunt for coins in the bottom of the bathtub, or bury them in the yard.
Chapter 2: Baby, My Dolphin Companion

Have a baby dolphin snack. Here is an example. Each dolphin will be made out of half an unpeeled banana, with the beak portion slit, in a small cup. But, for the decorations, you can use fruit (as pictured), goldfish crackers, blue jello, or anything your imagination comes up with.
Chapter 3: Amos’s Warning
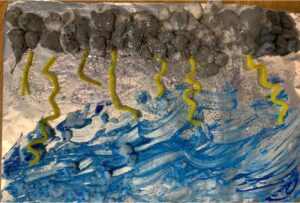
Make a collage of the storm. Using aluminum foil as the background/sky to give a silvery effect, and glue, tape, or glue dots to adhere items, you can create yellow zigzags, blue raindrops, and white clouds out of construction paper, foam, cotton balls, etc. You can even teach more about the different types of clouds by adhering them in different styles.
Chapter 4: Gold and Jewels
Create paper jewelry with your children, or use pasta shapes to create necklaces. We used a lot of yellow, as we wanted jewelry made of gold, but there’s no reason to stick to one color if your children want a kaleidoscope of colors.
Chapter 5: Lost in a Stormy Sea
This chapter was a little scary, and being lost can be hard on a sensitive child, so I came up with this as a way to not really be “lost,” while still exploring. Practice finding your way through a maze, pretending you are lost at sea. Taking a ball of yarn, twine, or other similar material, unwind it, leaving a trail over, under, and through various household obstacles, such as under the table, under the bed, or through the legs of a chair. Then, give your child one end of the string and have them wind the ball as they follow the path you left for them.
Chapter 6: Baby Saves My Life

Create a wave in a bottle. You can fill it with anything ocean-y you would like that fits in your bottle. Small shells, ocean toys, or rocks, or anything on hand will work, but a bottle with just waves is still a lot of fun.
After the Story:
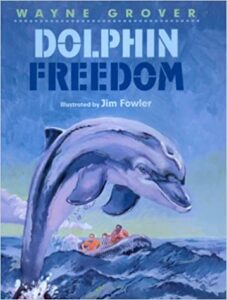
We also watched a few ocean-related movies for kids, including Flipper, Flip, Free Willy, and Finding Nemo. There is a third book in the series, which you can try, called Dolphin Freedom.
**Contains affiliate links.